Navigate Here: Implementation > Vendors > Add Vendor
You can add a vendor on the Add Vendor page.
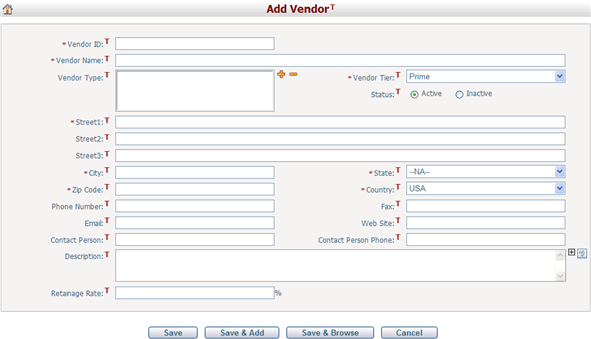
To add a vendor, fill in the following fields:
The required fields are noted with an asterisk (*).
Vendor ID*: The ID of the vendor. It must be unique.
Vendor Name*: The name of the vendor. It can be duplicated. (i.e. You can have multiple vendors with the same Vendor Name.)
Country*: The country where the vendor resides.
State: The state where the vendor resides.
City: The city where the vendor resides
Address1*/Address2: The address of the vendor.
Zip Code: The ZIP code of the vendor. The ZIP code must be in the format of ##### or #####-#### and only contain numbers. Any other format will not be accepted.
Contact Person: The vendor contact.
Phone: The phone number of the contact.
Email: The email address of the contact. The email address should be a similar format to "name@something.com". Any other format and it will not be accepted.
Vendor Type: Specify the vendor type. Vendor types are defined at Utilities > dropdown List Management > Vendor Types. Click ![]() to select vendor types and the system will pop up a Select Vendor Types window. You can select vendor types in the Available Vendor Types list and click
to select vendor types and the system will pop up a Select Vendor Types window. You can select vendor types in the Available Vendor Types list and click ![]() . To remove a vendor type, select the vendor type in the Selected Vendor Types list and click
. To remove a vendor type, select the vendor type in the Selected Vendor Types list and click ![]() . Click the OK button to save the selection. The popup window will be closed and the selected vendor type(s) will be displayed in the text box. To deselect a vendor type, highlight it and click
. Click the OK button to save the selection. The popup window will be closed and the selected vendor type(s) will be displayed in the text box. To deselect a vendor type, highlight it and click ![]() .
.
Total Scoping: Scoping total of the vendor.
Notes: Description of the vendor.
Is Active: Specify whether the vendor is active or not. Only active vendors are available for contracts, purchase orders, and project expenses.
Click the Save button to save the new vendor. The system will then go to the Browse Vendors page.
Click the Save & Add button to save the new vendor and add another vendor.