Navigate Here: Users > User Management > Add User or
Implementation > Vendors > Browse Vendors; select a Vendor > Users tab; Add User
Administrators can create a new user account on the User Management page.
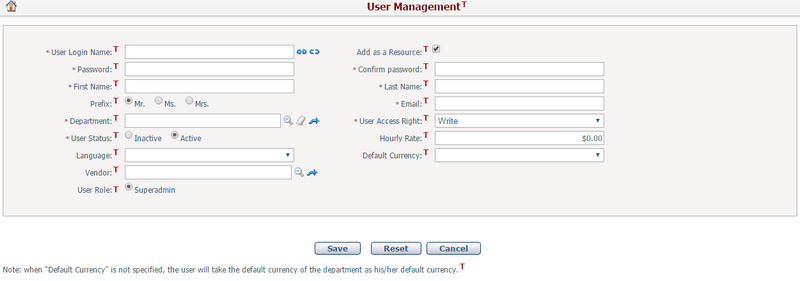
To add a user, provide the general information by filling in the following fields:
The required fields are noted with an asterisk (*).
User Login Name*: The text string by which the user logs into the system.
Add as a Resource: If you check this field, the user will be added as resource as well. The resource will have the user as the associated user, and Resource Name, Department, and Vendor (if applicable) of the resource will be the same as those of the user.
Password* & Confirm password*: Password can be the combination of letters and numbers. The password and the confirmed password must be the same.
First Name*, Last Name*, Prefix, E-mail*: The user’s personal information.
Department*: Select the user's department. Click on the magnifier icon![]() to select from a list of available departments. When a department is selected, you can click the View Department Information icon to enter Department Management page directly.
to select from a list of available departments. When a department is selected, you can click the View Department Information icon to enter Department Management page directly.
User Access Right: Select an overall access right for the user. User Access Right is to give user permission to access (Read Only or Write) all of the modules in the system. The access right can be specified by module and function and overridden with Access Control. Also, every Read Only user takes up a Read Only license, while every Write user takes up a Full Access license. See Browse License Users.
User Status: If you select Inactive, the user has no permission to log into the system.
Hourly Rate: Enter user's hourly pay rate.
Language: The default language of the user. Note: when it is not specified, the user will take the default language of the department as his/her default language.
Default Currency: The default currency for the user to enter or view monetary data in the system. Note: when it is not specified, the user will take the default currency of the department as his/her default currency.
Vendor: Specify a vendor that is associated with the current user. When a vendor is selected, you can click the View Vendor Information icon to enter Manage Vendor General Informatione page directly. If you enter this page by clicking on the Add icon of the Vendor Users Management page, this field will be defaulted to that vendor and it cannot be changed.
User Role*: Select the user's role. A user role reflects a particular job function of a group of users. You can create a role in Add Role. You may configure the program access rights and data access rights for the individual user or role in Access Control.
Click the Save button to save the new user. The system will then go to the Browse Users page.
Click the Reset button to clear your entries.
Click the Cancel button to discard the latest changes. The system will then go to the Browse Users page.
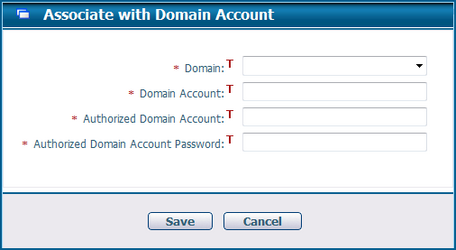
Click the Associate icon
Domain*: Select a domain from the Domain dropdown list.
Domain Account*: Enter a domain account from the domain you selected.
Authorized Domain Account*: Enter a domain account to connect to the selected domain. This field is invisible if the selected domain already has a saved account in database.
Authorized Domain Account Password*: Enter the password of the authorized domain account. This field is invisible if the selected domain already has a saved account in database.
Click the Save button to associate the entered domain account with the current user. Click the Cancel button to close the dialog box without associating.
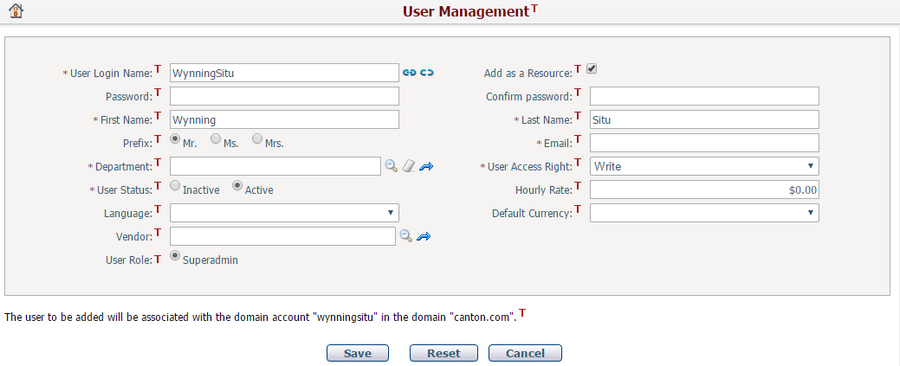
After associating successfully, the User Login Name, First Name, and Last Name will be auto-populated with corresponding fields of the associated domain account; the Password and Confirm Password fields will become non-required; and the domain account information will be shown at the bottom of the screen.
Click the Disassociate icon
|