Navigate Here: Utilities > Workflow > Manage Auto Alert > Click the Add icon
You can add new auto alert criteria by clicking the Add icon ![]() on Browse Auto Alert Criteria page and then system will bring you to the Add Auto Alert Criteria page.
on Browse Auto Alert Criteria page and then system will bring you to the Add Auto Alert Criteria page.
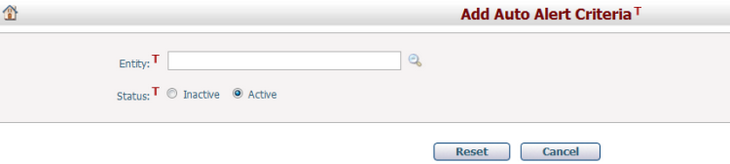
Entity: Select an entity which this auto alert criteria will be applied to by clicking the Magnifier icon ![]() . Once the entity has been selected, the system will lead us to the following page.
. Once the entity has been selected, the system will lead us to the following page.
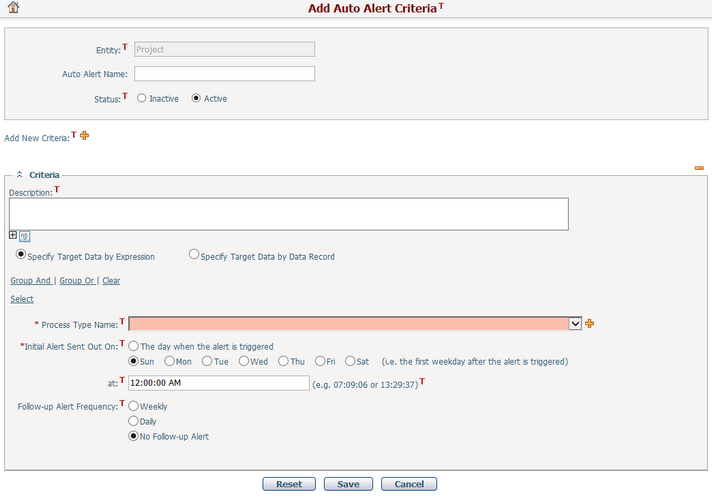
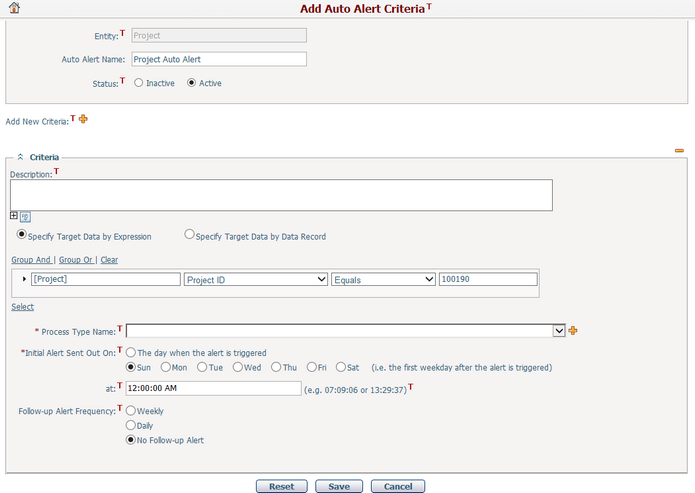
Auto Alert Name: The name of the current auto alert criteria.
Status: Toggle these two radio button to control whether the criteria is Active or Inactive. Active is selected by default.
Description: The description of the auto alert criteria.
Specify Target Data by Expression: if this option is selected, it means the target data is specified by defining an expression.
Specify Target data by Data Record: You will see a data record table if you select Specify Target Data by Data Record.

Click the Add icon ![]() to select data records in a pop up window where you can browse or search for related data records.
to select data records in a pop up window where you can browse or search for related data records.
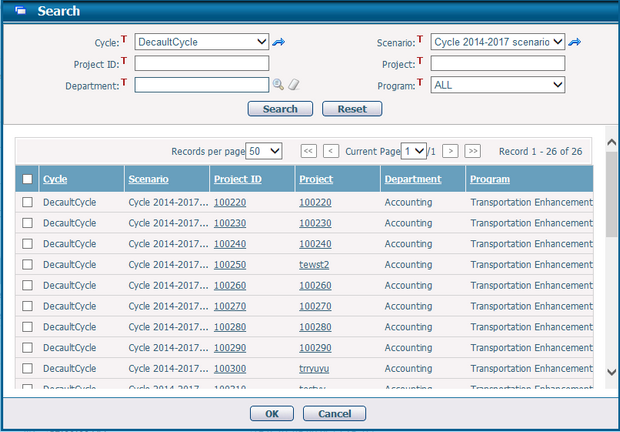
Please check the check-boxes to select the target data and click the OK button to save the record.
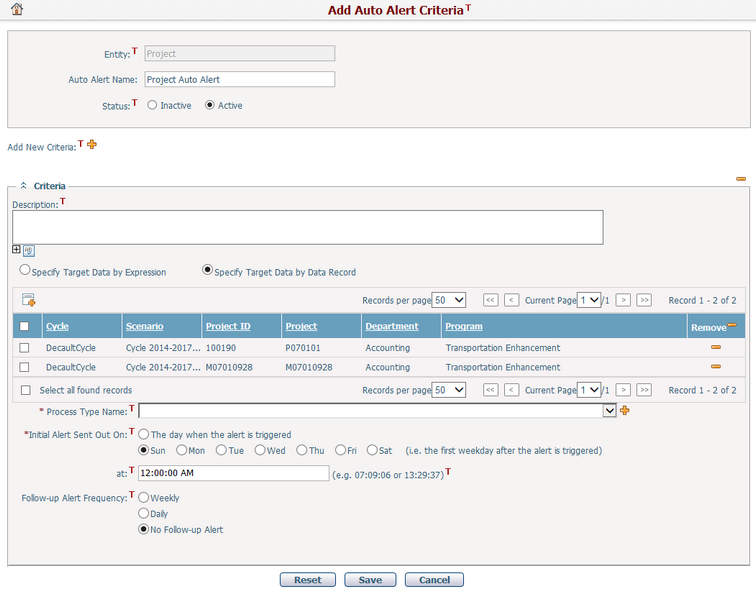
Initial Alert Sent Out On: Specify when the initial alert should send out.
Follow-up Alert Frequency: Specify how often the auto alert should be triggered. Three options are provided, including Weekly, Daily and No Follow-up Alert. If No Follow-up Alert is selected, it means that the alert sends out only one time.
Process Type Name: The workflow process type name this auto alert criteria is related to. There are two approaches to load a workflow process type. One choice is to load the workflow process type directly from the dropdown list while the precondition is one or more appropriate process type has been predefined. The other choice is to add a workflow process type by clicking icon ![]() aside, then a window will pop up as following.
aside, then a window will pop up as following.
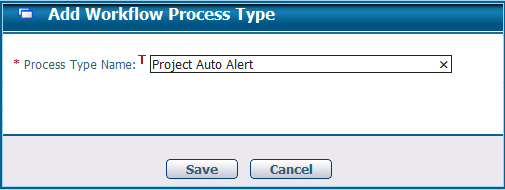
You can input a process type name in the field accordingly and then click Save button. In addition, you need define this workflow process type. Firstly, you should screen out the newly added workflow process type on Workflow Process Management page.
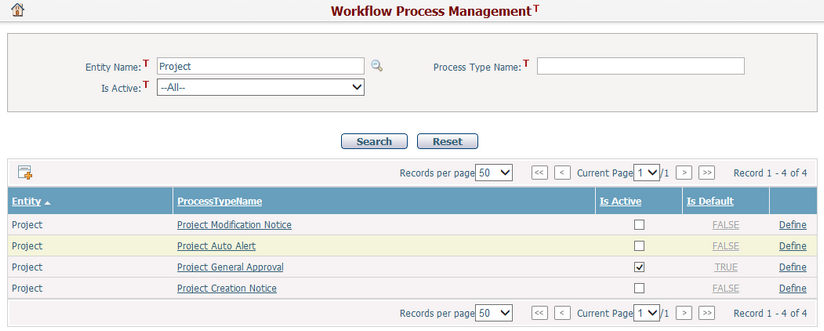
You can click the "Define" field to enter into Workflow Process Definition page.

And then you should define the workflow process type accordingly. For example, you can use the Auto Email Activity to send an email to your target users and please note that the email will be send out only when the data records satisfy the condition set.
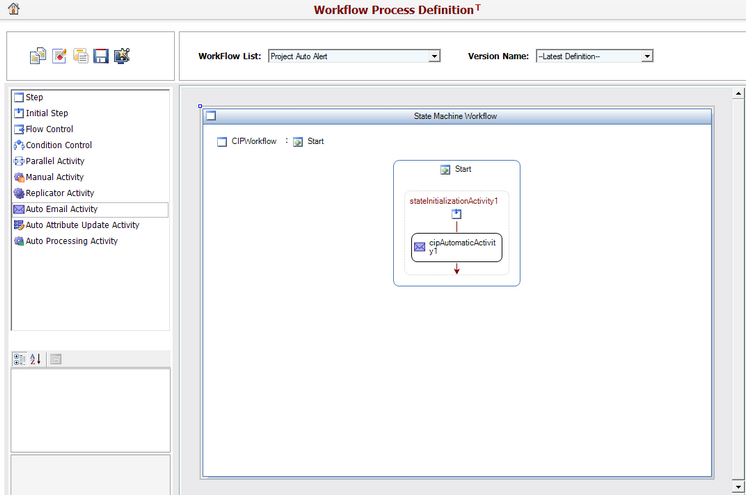
As for how to define an Auto Email Activity, please refer to Edit Auto Email Activity.
After you specified the data element, you can click ![]() to add another data element.
to add another data element.
You can click ![]() at the end of a row to delete that record.
at the end of a row to delete that record.
Click the Reset button to clear all inputs.
Click the Save button to save all inputs.
Click the Cancel button the criteria will not be saved.