Navigate Here: Utilities > System Management > Application Settings > Domains Tab > click the Add icon
You can add a domain to the system on the Add Domain page. Only the accounts in an available domain can be associated with CIPAce accounts and to be used to log in to the system.
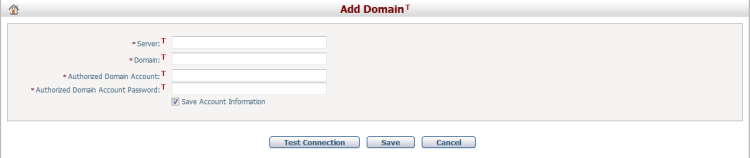
To add a domain, provide the general information by filling in the following fields:
The required fields are noted with an asterisk (*).
Server *: The name of the Server. For example, just enter YourCompany.com but you do not have to type the “http://www.” portion.
Domain *: The name of the Domain. Usually, the domain name is the same as the server’s name.
Authorized Domain Account *: An account in the domain.
Authorized Domain Account Password *: The password of the domain account.
Save Account Information: Whether to save the account information provided above into database. With the account information saved, you will no longer need to provide the account information when you want to connect to the domain on other pages. But if you don't want to save the account information for security concerns, you can make this option unchecked. In that case, you will be required to provide account information every time when you intend to connect to the domain.
Click the Test Connection button to test the connection to the domain using the information you entered.
Click the Save button to save the information for the new domain. Before saving, the system will validate the connectivity. If validation fails, the domain will not be added to the system. After the domain is added successfully, the system will go to the Browse Domains page.
Click the Cancel button to go to the Browse Domains page without adding the domain.