Navigate Here: Utilities > Custom Field Management > Browse Entities, click the Browse Forms link of an entity > Browse Forms, click the Edit Form link of a form
You can edit a dynamic form of a entity through the form editor.
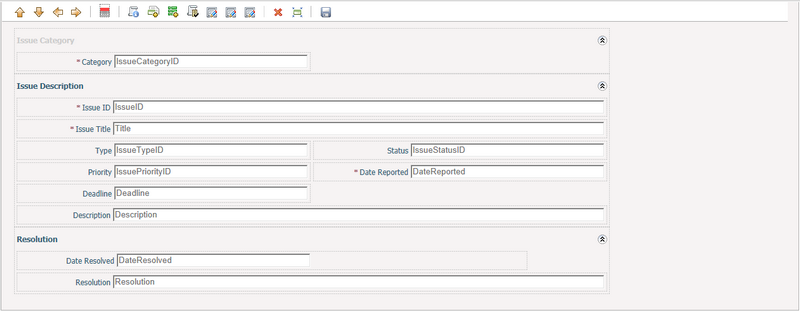
A form is composed of titles, sections and fields.
Title
Click the Change Form Titles icon ![]() to pop up Form Titles screen.
to pop up Form Titles screen.
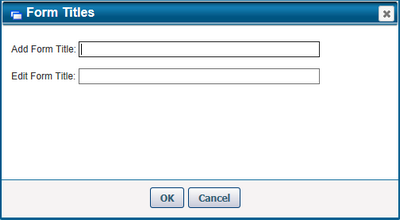
You can input new titles in the textboxes for both add and edit pages to replace those pre-defined titles and click the OK button to return to the form editor.
Section
To add a section, click the Add a Section icon ![]() in the tool bar. The system will pop up the Section Property window for your section creation.
in the tool bar. The system will pop up the Section Property window for your section creation.
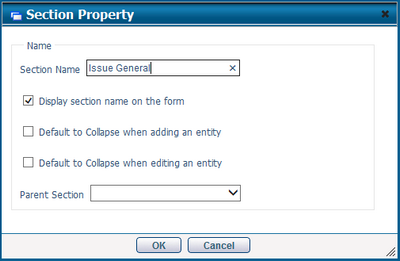
Fill in the following fields or options:
Section Name: The name of the section.
Display section name on the form: This option controls if the section name will be displayed on the form. It is checked by default.
Default to Collapse when adding/editing any entity: These two options control if this section will be expanded or collapsed on the add and edit forms.
Parent Section: To select the an existing section as its parent section. Parent-sub sections will be displayed by hierarchy on the form.
Note:
❑ Only consecutive sections can be set as parent-sub section relationship.
❑ Only non sub section can be set as the parent section.
Once finished, clicks the OK button and the new section will be shown on the bottom of the form.
To edit a section's properties, select a section by clicking on the section area, then click the Change Property icon ![]() . The system will pop up the Section Property window for your modification
. The system will pop up the Section Property window for your modification
Field
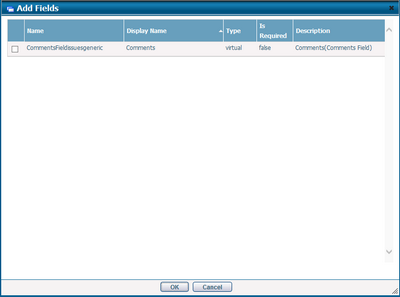
To add fields into a section, select a section by clicking on the section area, then click the Add Fields icon ![]() . The system will pop up the Add Fields window. Select the available fields and click the OK button, and they will be add to the bottom of the selected section. Note, the display name of the field will be shown as field label, and its database name will be shown in the textbox for your reference.
. The system will pop up the Add Fields window. Select the available fields and click the OK button, and they will be add to the bottom of the selected section. Note, the display name of the field will be shown as field label, and its database name will be shown in the textbox for your reference.
To edit field property, select a field and click the Change Property icon ![]() . The system will pop up the Field Property window.
. The system will pop up the Field Property window.
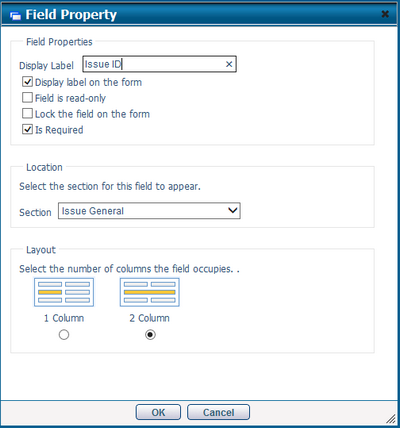
Fill in the following fields or options:
Display Label: By default, it is the display name of the field. You can change its field label for this form only.
Display label on the form: If it is checked, the label will be shown on the form, or it will be hidden. It is checked by default.
Field is read-only: If it is checked, the field is read-only on the form, or it is editable.
Lock the field on the form: If it is checked, the field cannot be deleted from the form editor.
Is Required: If it is checked, the field will be required on the form with a "*" in front of its label. Note, if a field is required in the Attribute setting, this option will be bypassed.
Location: You can set which section the field will be located on the form. Select an existing section from the Section list and the field will be repositioned under the bottom of the section.
Layout: You can set the layout of the field on the form. There are two options: 1 Column or 2 Column.
Once finished, click the OK button to return to the form editor with changes applied.
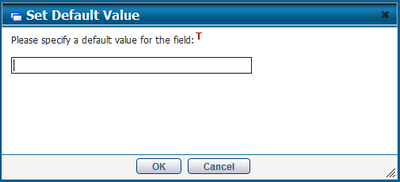
To set the default value for a field, select a field and click the Set Default Value icon ![]() . Fill in the default value in the pop up window and then click the OK button. Note, some field types do not support default value settings, like Boolean.
. Fill in the default value in the pop up window and then click the OK button. Note, some field types do not support default value settings, like Boolean.
To remove a field or a section, select the field or the section by first clicking it and then click the Remove icon ![]() .
.
To reorder a field or a section, select the field or the section by first clicking it and then click the Move Left icon ![]() , the Move Right icon
, the Move Right icon ![]() , the Move Up icon
, the Move Up icon ![]() , or the Move Down icon
, or the Move Down icon ![]() .
.
To remove the empty rows in a section, select the section and click the Remove Empty Row(s) icon ![]() .
.
All changes above must be saved by clicking the Save icon ![]() finally.
finally.