Navigate Here: Workspace > My Tasks > New Tasks / Tasks to be Processed / Completed Tasks
User Task Lists are prioritized lists of the task items that a person (or group of people) was asked to complete. A task list is a standard CIPAce grid. Therefore, the user can use grid personalization features to order and sort columns. After a workflow task has been routed to an authorized CIPAce user, it will be shown on the user’s task list. To work on an item, select a task from the task list and you will be directed to the appropriate page to begin your work.
The User Task List page is consisted of three tab pages: New Tasks, Tasks to be Processed, Completed Tasks. Below are the definitions for the commonly used terms on these three tab pages:
Definitions:
Entity Name: the name of the entity related to the workflow process type.
Process Type Name: the name of the process type.
Workflow Instance Name: the name of the workflow instance.
Task: name and link of the task being assigned to you.
Is Delegted: whether the task was delegated.
Delegated to: the participants that the task is being delegated to.
Include Tasks Delegated to Me: if this option is selected, the page will display tasks including those being delegated to you. It's selected by default.
Include Tasks Delegated by Me: if this option is selected, the page will display tasks including those being delegated by you (to other participants). It's selected by default.
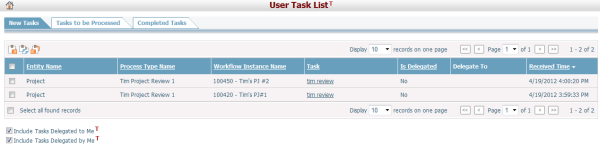
When a workflow is triggered, the task will put into the defined user's new tasks list.
A brief summary of each task is displayed in the table. The summary includes Entity Name, Process Type Name, Workflow Instance Name, Task, Is Delegated, and Delegate to. For their definitions, please refer to the Definitions section at the top. Received Time column displays when the new task was received.You may sort the records by clicking the linked column header. If there are too many records to be displayed on one page, you can use the navigation control to view the other pages, or you may increase the number of records per page.
Click the name of a task in the Task column and the system will direct you to the entity page related to this task although you won't be able to process these tasks until they're accepted.
Select task items in the grid and click the Accept Selected Tasks icon
If you intend to accept and process tasks in bulk immediately, select the desired tasks and click on the Accept and Process Selected Tasks icon
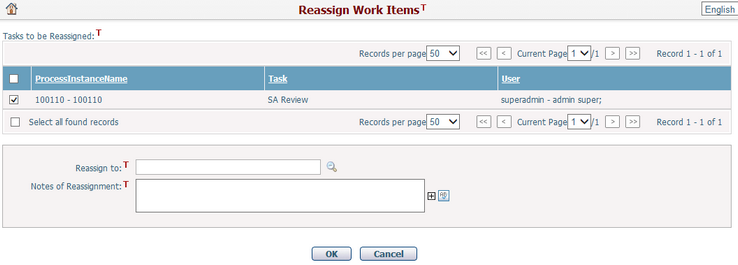
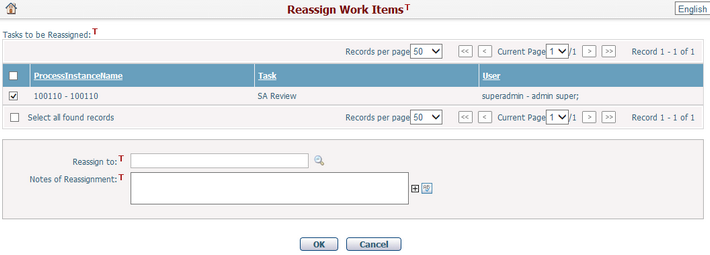
For tasks that you don't intend to accept, you can reassign them to another user by selecting the tasks and click the Reassign Selected Tasks icon
Select tasks (work items) by checking the corresponding check box(es), then select a user or multiple users in the Reassign to field.
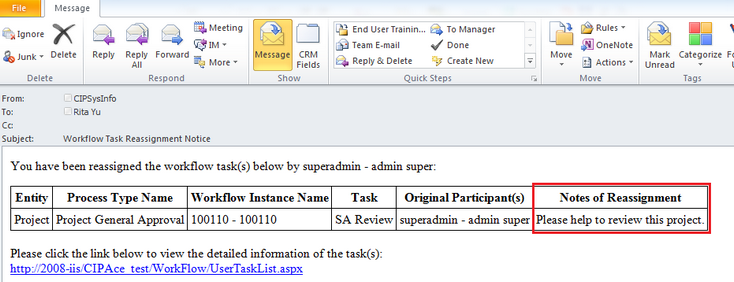
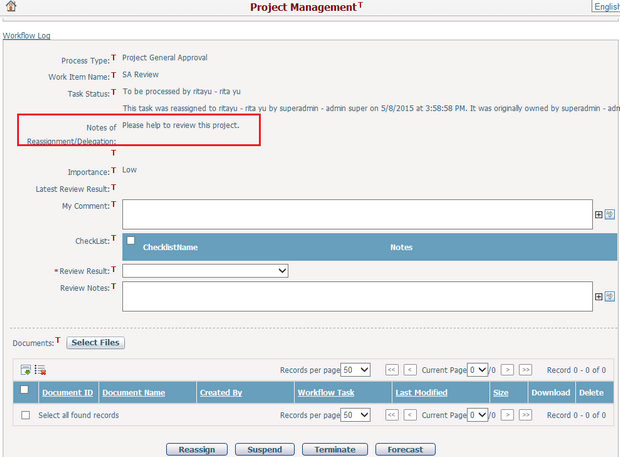
Fill in Notes of Reassignment, and this note will appear in the Reassign Notification email and the Note of Reassignment/Delegation field in the workflow panel.
Click the OK button and the tasks will be removed from your task list and added to the task list of the new participant(s).
|
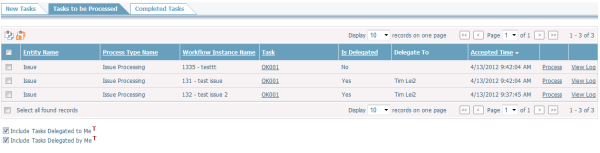
When a new task is accepted by the user, it will be moved to this tab page.
A brief summary of each task is displayed in the table. The summary includes Entity Name, Process Type Name, Workflow Instance name,Task, Is Delegated, Delegate to and Accepted Time. For their definitions, please refer to the Definitions section at the top. Accepted Time column displays when the new task was accepted. You may sort the records by clicking the linked column header. If there are too many records to be displayed on one page, you can use the navigation control to view the other pages, or you may increase the number of records per page.
Click the name of a task in the Task column and the system will direct you to the entity page related to this task. You will be able to process the workflow task on the entity page.
Click the View Log link to view the history records related to the workflow process.
Select task items in the grid and click the Process Selected Tasks icon
For tasks that you don't intend to accept, you can reassign them to another user by selecting the tasks and click the Reassign Selected Tasks icon
Select tasks (work items) by checking the corresponding check box(es), then select a user or multiple users in the Reassign to field.
Fill in Notes of Reassignment, and this note will appear in the Reassign Notification email and the Note of Reassignment/Delegation field in the workflow panel.
Click the OK button and the tasks will be removed from your task list and added to the task list of the new participant.
Please note that if a workflow task is rejected by the participant, it is configurable to re-define the task participants by either way of the predefined participants defined in the process definition or of participants who process the previous task.
|
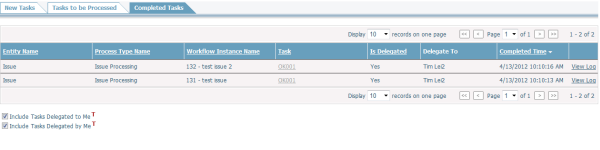
The workflow tasks completed by a user will be listed on this tab page.
A brief summary of each task is displayed in the table. The summary includes Entity Name, Process Type Name, Workflow Instance Name, Task, Is Delegated, Delegated to and Completed Time. For their definitions, please refer to the Definitions section at the top. Completed Time column displays when a task was completed. You may sort the records by clicking the linked column header. If there are too many records to be displayed on one page, you can use the navigation control to view the other pages, or you may increase the number of records per page.
Click the View Log link to view the history records related to the workflow process. .
|