To configure a Report workbox, fill in the following fields:
The required fields are noted with an asterisk (*).
Workbox Title*: The title of the report workbox. It will appear in the workbox title bar. The default value is "Report".
Workbox Type*: The type of report workbox. There are two types that can be selected: Analytics Report and Custom Report. Different report type will have different configurations.
Once you've finished the configuration, click the Save button to save the changes.
Click the Save & Set as Workbox Template to save the current workbox as a new template.
Click the Reset button to clear the latest inputs.
Click the Cancel button to abort and return without saving.
You can select an existing analytics report from the right-hand dropdown list, the selected report will be displayed in the workbox directly.
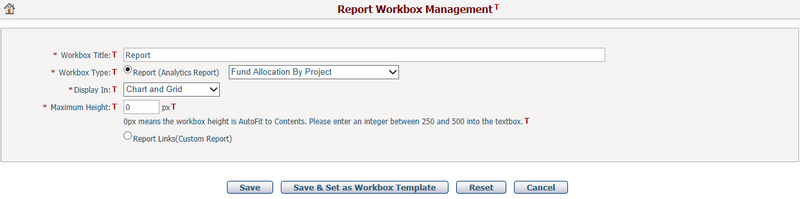
Display In*: This option determines how the analytics report will be displayed. There are three options:
❑ Chart Only: Only Chart will be displayed.
❑ Grid Only: Only Grid will be displayed.
❑ Chart and Grid (Default): Both Chart and Grid are available for users to switch and display. Whether Chart or Grid will be viewed by default is determined by the option "Default to Grid View" in the Analytics Report Management page.
Maximum Height*: The maximum height of the workbox. It should be between 250px to 500px. By default it is 0px, and it means the height of workbox is auto-fit to its contents.
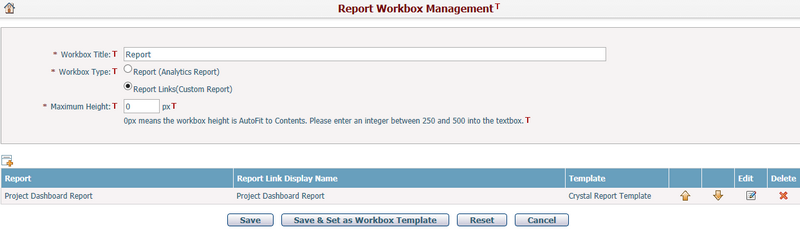
You can add multiple report links of the existing custom reports into a table displayed in the workbox.
To add a new report link, click the Add a report link icon ![]() to go to the Edit Report Link page:
to go to the Edit Report Link page:
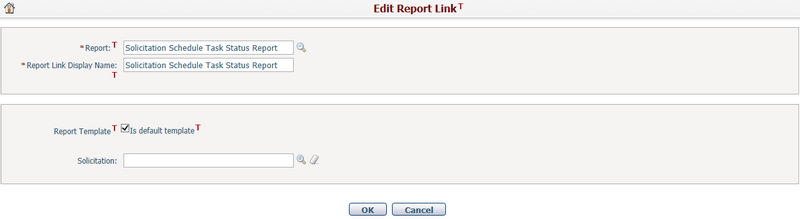
Fill in below fields for a new report link:
The required fields are noted with an asterisk (*).
Report*: Browse and select an existing custom report by clicking ![]() . Available reports will be listed by report category in the popup window.
. Available reports will be listed by report category in the popup window.
Report Link Display Name*: The display name of the report link displayed in the table in the workbox.
Report Template: The report template to be used. There are two options:
❑ Is default template = True, that means this report will use the latest default template in Custom Report Management template definition automatically.
❑ Is default template = False, a drop down list will be displayed for you to select an existing report template for the current report. Note: If no report template has been selected, system will generate a default Excel report with source data only.
Pre-defined report parameters will be displayed under the Report Template field, and you can input their default values for the current report.
Click OK button to save the changes temporarily or click Cancel button to return without saving.
After added a report link successfully, it will be displayed at the bottom line in the table with Report, Report Link Display Name and Template.
You can reorder the sequence of the report links by clicking Move Up / Down icons ![]()
![]() on each row.
on each row.
You can click the icon ![]() in the Edit column of each row to edit the report link.
in the Edit column of each row to edit the report link.
You can click the Delete icon ![]() at the end of a row to delete a report link.
at the end of a row to delete a report link.