Navigate Here: Financials > Expenses > Search Project Expenses > select an expense amount > select an expense record
You can manage a project expense on this page.
Encumbrance/Pending Expense
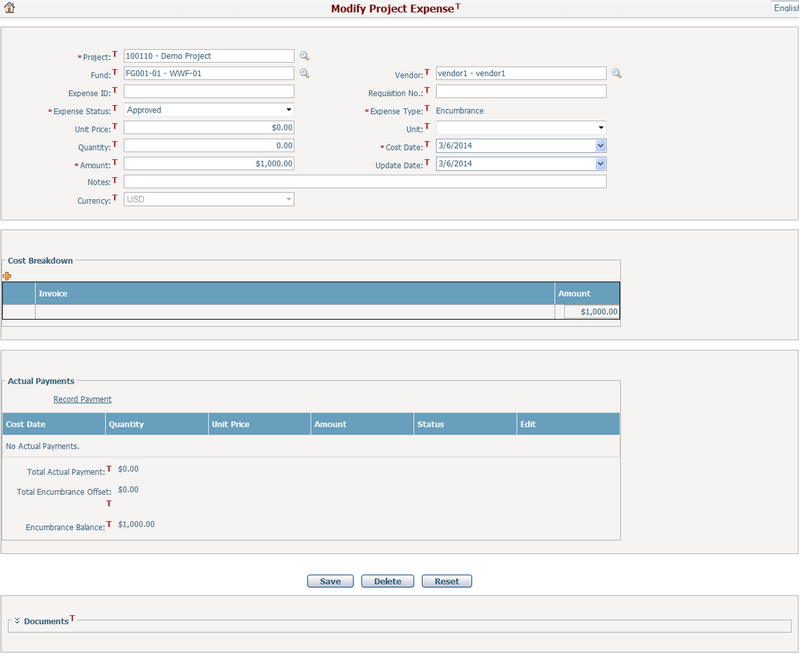
❖ If the expense item is not related to a contract/PO and without any actual payment yet, the following fields are editable (except Expense Type & Currency):
The required fields are noted with an asterisk (*).
Project*: Specify the project which the expense belongs to. Browse and select a project by clicking ![]()
Fund: Select a fund source where the project expenditure item comes from. Browse and select a fund by clicking ![]()
Vendor: Select a vendor by clicking ![]() . If a vendor is not in the list, you can add it in Add Vendor.
. If a vendor is not in the list, you can add it in Add Vendor.
Expense ID: The ID of the project expense. It must be unique.
Requisition No.: The requisition number of the project expenditure item.
Expense Status*: There are three project expense statuses: On-Hold, Approved, and Rejected. Only the Approved expense will be calculated as the real expenditure.
Unit: The unit for the number of items that will be expended.
Unit Price/Quantity/Amount*: The quantity and unit price of the items. The Amount shows the calculated total expense or the expense directly input by the user.
Cost Date*: Specify the date when incurring the expense.
Update Date: Specify the date when updating the expense.
Notes: Description of the expense.
Note: If you have added any actual payment for this expense item, its Project, Fund and Vendor will not be able to be modified again.
❖ If the expense item is related to a contract/PO line item, only Vendor, Expense ID, Requisition No., Update Date, Notes can be modified.
❖ If the expense item is an encumbrance offset with negative amount generated by actual payment, all fields cannot be edited.
Actual Expense
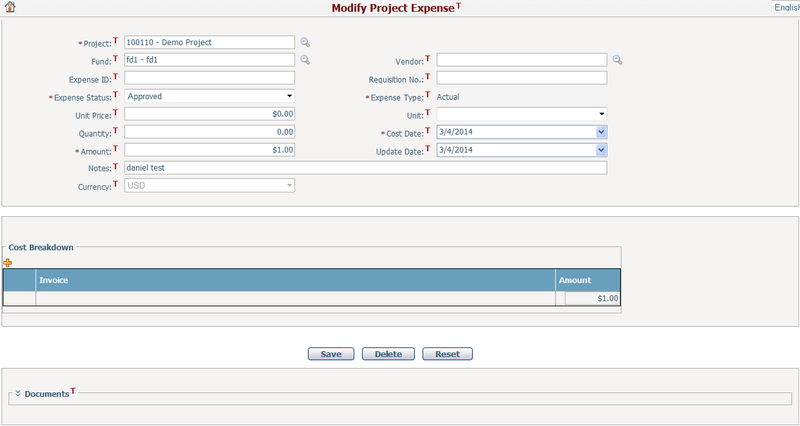
❖ If the expense item is not a payment against an encumbrance/pending expense, the following fields are editable (except Expense Type & Currency):
Project*: Specify the project which the expense belongs to. Browse and select a project by clicking ![]()
Fund: Select a fund source where the project expenditure item comes from. Browse and select a fund by clicking ![]()
Vendor: Select a vendor by clicking ![]() . If a vendor is not in the list, you can add it in Add Vendor.
. If a vendor is not in the list, you can add it in Add Vendor.
Expense ID: The ID of the project expense. It must be unique.
Requisition No.: The requisition number of the project expenditure item.
Expense Status*: There are three project expense statuses: On-Hold, Approved, and Rejected. Only the Approved expense will be calculated as the real expenditure.
Unit: The unit for the number of items that will be expended.
Unit Price/Quantity/Amount*: The quantity and unit price of the items. The Amount shows the calculated total expense or the expense directly input by the user.
Cost Date*: Specify the date when incurring the expense.
Update Date: Specify the date when updating the expense.
Notes: Description of the expense.
❖ If the expense item is a payment against an encumbrance/pending expense which is not related to a contract/PO, Project, Fund, Vendor, Expense Type, Remaining Amount and Currency cannot be modified.
❖ If the expense item is a payment against an encumbrance/pending expense which is related to a contract/PO, only Expense ID, Requisition No., Update Date, Notes can be modified.
Once you finish, clicks the Save button to save the changes to the current project expense.
You can click the Delete button to delete a project expense. The system will then return to the Search Project Expense Results page.
Note: The delete function is for an encumbrance/pending expense item which is not related to a contract/PO or an actual expense item which is generated by Record Payment link in an encumbrance/pending expense.
- If an actual expense which is a payment against an encumbrance/pending expense is deleted, its corresponding encumbrance or pending expense offset will also be deleted;
- If an encumbrance/pending expense is deleted, all of its payments and encumbrance/pending expense offsets will also be deleted.
You may continue to add cost breakdown, actual payment or documents to this expense as explained in below sections.

You can further break down the cost information of the expense by manually inputting Invoice and Amount, and the system will automatically calculate the remaining amount after breakdown = [expense total amount - all breakdown amounts].
You may click ![]() to insert a cost breakdown record or click
to insert a cost breakdown record or click ![]() to delete a cost breakdown record.
to delete a cost breakdown record.
Manage Actual Payment
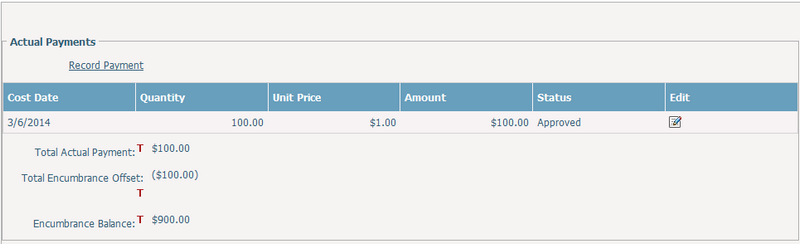
For an Encumbrance/Pending Expense, you can add actual payment against it by clicking the link of Record Payment, and the system will go to the Add Project Expenditure Item page to add partial payment against contract, PO or encumbrance/pending expense.
Note: If an encumbrance expense is related to a contract which has split line items, Record Payment function will be disabled in this page, and you can only add invoice payment in Manage Invoice module instead.
After the actual payment has been saved successfully, it will show in a table by Cost Date, Quantity, Unit Price, Amount and Status, and you can also click the Edit icon ![]() to update the detail of that actual expense item.
to update the detail of that actual expense item.

The document section will be only available for an encumbrance/pending expense item which is not related to a contract/PO or an actual expense item which is not a payment against an encumbrance/pending expense.
The document(s) associated with the current expense item display in the table. A brief summary of each related document includes Document ID, Document Name, Created By, Last Modified Time, Is Checked Out, and Is Linked Document (These columns in the data grid can be configured by Dynamic View). You may sort the records by clicking the linked column header.
You can upload a new file and associate it with the current expense item by clicking ![]() . The system will go to the Add Document page.
. The system will go to the Add Document page.
You can view the detailed information of a document by clicking ![]() . The system will open the Document Management page of the document in a new window.
. The system will open the Document Management page of the document in a new window.
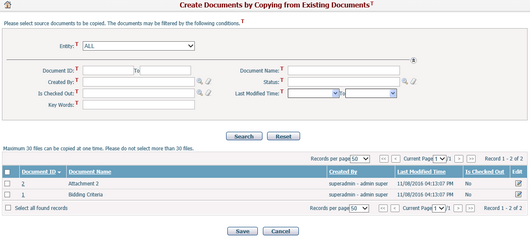
You can batch copy document(s) into the current expense item by clicking ![]() . The system will go to the "Create Documents by Copying from Existing Documents" page for your selection of document(s).
. The system will go to the "Create Documents by Copying from Existing Documents" page for your selection of document(s).
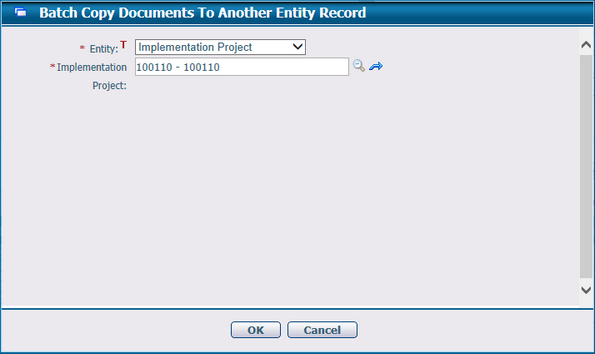
You can batch copy document(s) from the current expense item to another entity by selecting the document(s) and clicking ![]() . The system will go to the "Batch Copy Documents To Another Entity Record" page for your selection of target entity record.
. The system will go to the "Batch Copy Documents To Another Entity Record" page for your selection of target entity record.
You can batch associate document(s) with the current expense item by clicking ![]() . The system will go to the Browse Documents page for your selection of document(s).
. The system will go to the Browse Documents page for your selection of document(s).
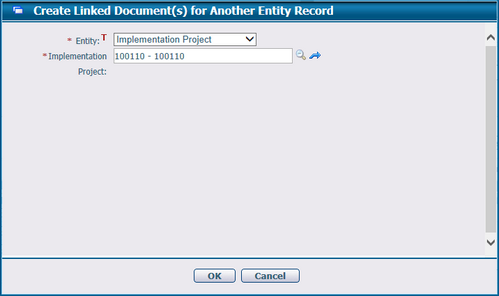
You can batch associate document(s) from the current expense item to another entity record by selecting the document(s) and clicking ![]() . The system will go to the "Batch Associate Documents To Another Entity Record" page for your selection of target entity record.
. The system will go to the "Batch Associate Documents To Another Entity Record" page for your selection of target entity record.
You can batch delete document(s) from the current expense item by selecting the document(s) and clicking ![]() .
.
You can redline the document by clicking the Markup icon ![]() . The system will then open Online Document Markup page in a new window.
. The system will then open Online Document Markup page in a new window.
You can download document file(s) associated with the current expense item by clicking ![]() .
.