Navigate Here: Projects > Browse Planning Projects or Projects > Browse Implementation Projects
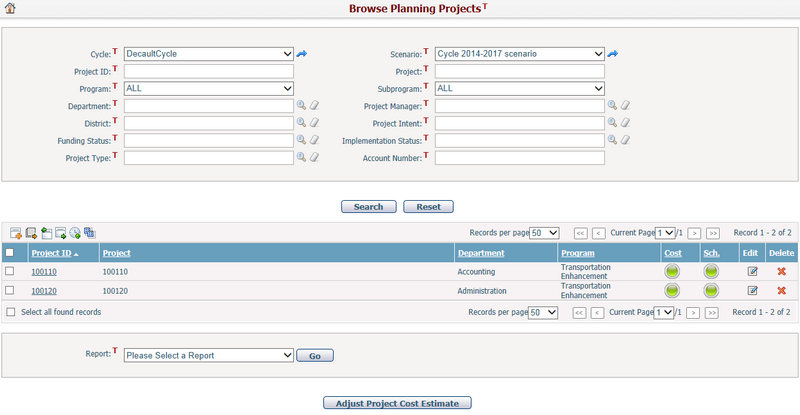
You can browse all planning projects and find specific planning projects on the Browse Planning Projects page.
You can browse all implementation projects and find specific implementation projects on the Browse Implementation Projects page.
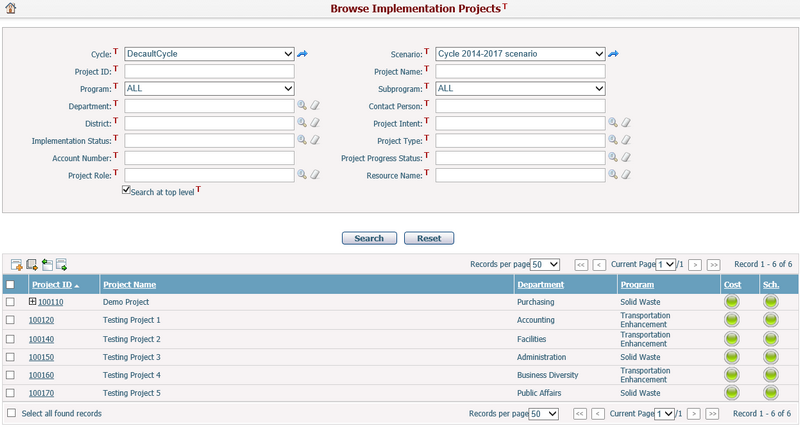
You can quickly find the projects you want by using the search function. Enter the search conditions in the search fields and click the Search button. The projects will be filtered and the table will show the records that match the search conditions. Click the Reset button to clear the search conditions. Please note, when searching for implementation projects, if you don't want to search sub projects, make sure that the Search at Top Level option is checked.
A brief summary of each project is displayed in the table. The summary includes Project ID, Project Name, Department, Program, Cost, and Schedule. The records are sorted by Project ID by default but you can also sort them by clicking other underlined column headers. If there are too many records to display on one page, you can use the navigation control to view the other pages.
In the table, click the Project ID/Project Name link or click the Edit icon ![]() at the end of a row and the system will go to the Planning Project General page of the corresponding project.
at the end of a row and the system will go to the Planning Project General page of the corresponding project.
Click the Delete icon ![]() at the end of a row in the table to delete a project. A dialog will prompt you for confirmation before the project can be deleted. Project related records such as tasks, timesheets, risks, and issues will be deleted as well. A dialog will prompt for confirmation before the project is deleted from the system. If there are contract line items, purchase order line items or invoice line items associated with this project, the project cannot be deleted.
at the end of a row in the table to delete a project. A dialog will prompt you for confirmation before the project can be deleted. Project related records such as tasks, timesheets, risks, and issues will be deleted as well. A dialog will prompt for confirmation before the project is deleted from the system. If there are contract line items, purchase order line items or invoice line items associated with this project, the project cannot be deleted.
Click the Add icon ![]() in the upper-left corner of the table to add a new project and the system will go to the Add Project page.
in the upper-left corner of the table to add a new project and the system will go to the Add Project page.
Export Data Source
You can export all found records to an Excel file as a data source by clicking the Export Data Source icon ![]() in the upper-left corner of the table and the Export Data dialog will pop up. In the Export Data dialog, you can select a data source and export the project data by clicking the Export button.
in the upper-left corner of the table and the Export Data dialog will pop up. In the Export Data dialog, you can select a data source and export the project data by clicking the Export button.
Note: To export data source, you must first create a Query data source. You can add a data source on the Add Data Source page.
Batch Update
The Batch Update feature is designed for users to update particular fields with same value for multiple entity records. This feature is only available for some entity and some entity fields are allowed for batch update, these are configured by Implementation Staff. The following discussion will take the Project entity as an example to illustrate the Batch Update process.
You can navigate to the Top-Left corner of the Project list and look for the Batch Update icon ![]() . This icon will be in display once this entity has been configured for Batch Update.
. This icon will be in display once this entity has been configured for Batch Update.

To start with:
First, you need to select one or more projects as the candidates for batch update.
Second, you need to click the Batch Update icon![]() .
.
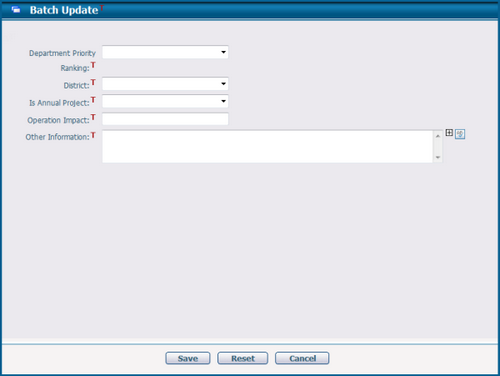
Now you have entered Batch Update form as shown above. On this Batch Update form, the layout and the available fields are customizable on a dynamic form by Implementation Staff, therefore you may experience the layout and content is different form the above Batch Update form.
You can comply the following action on this Batch Update form.
1.Edit the value for the available project fields and click the Save button to proceed the update to all selected projects. (Note: At least one updated fields is required for a successful batch update, empty fields will not count for batch update, and Batch Update is not supporting batch erase content.)
2.Click the Reset button to reset all inserted value on this form.
3.Click the Cancel button to previous page. As for this example you will return to Browse Project page.
Import and Export Project Data
You can import the project data from an Excel file by clicking the Import Data icon ![]() in the upper-left corner of the table and the system will open the Import Excel Data page.
in the upper-left corner of the table and the system will open the Import Excel Data page.
You can export the project data to an Excel file by clicking the Export Data icon ![]() and the Export Entity Data dialog will pop up. In Export Entity Data dialog, you can select a data template and export the project data by clicking the Export button.
and the Export Entity Data dialog will pop up. In Export Entity Data dialog, you can select a data template and export the project data by clicking the Export button.
Note: To export entity data, you must first add an excel data template. You can add an excel data template on the Add Excel Data Template page.
Create Projects from Historical Plan
Click the Create Projects from Historical Plan icon ![]() in the upper-left corner of the table to create projects by importing project data from historical plan and the system will go to the Import Data from Historical Plan screen. This icon will appear only if cycle and scenario are specified in the respective search fields.
in the upper-left corner of the table to create projects by importing project data from historical plan and the system will go to the Import Data from Historical Plan screen. This icon will appear only if cycle and scenario are specified in the respective search fields.
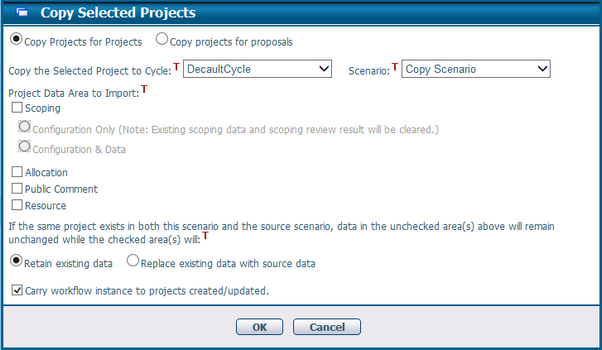
Copy Selected Projects to Another Cycle/Scenario
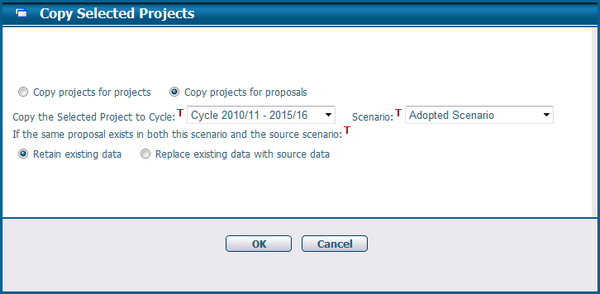
Select projects and click the Copy Selected Projects to Another Cycle/Scenario icon![]() in the upper-left corner of the table to copy the selected projects to another cycle/scenario and the system will pop up a window to let you select the target cycle/scenario.
in the upper-left corner of the table to copy the selected projects to another cycle/scenario and the system will pop up a window to let you select the target cycle/scenario.
You can either copy the selected projects as projects in the selected target cycle/scenario or as proposals in the selected cycle/scenario.
If you want to include scoping data in the copy, check the Scoping option, then select whether you want to copy just the scoping configurations or copy both the configurations and data.
If you want to include allocation data in the copy, check the Allocation option.
If there are any association relationships used in project, like Resource, etc, the corresponding checkboxes will be displayed and you can choose whether or not to copy these relationships into the target projects.
If Public Comments are used in project, the corresponding checkbox will be displayed and you can duplicate all comment records into the target projects.
When the same project exists in the current and destination scenario, you have two options, either Retain existing data (of the project data in the destination scenario), or Replace existing data with source data.
If you want to carry workflow instance to the target projects, check the Carry workflow instance to projects created/updated option.
Please note that when you conduct project transfer with scoping (configuration only or configuration & data) via Create Projects from Historical Plan or Copy Selected Project to Another Cycle/Scenario, the batch default scoping scenario will be copied as follows:
Scenario 1: Source project’s scoping scenarios contain no source batch default scoping scenario.
Transfer Process & Result: Project specific scoping scenarios, templates, and scoping data of the source project will be copied and carried over to the target cycle/scenario; source batch default scoping scenario will not be copied to the target cycle/scenario.
Scenario 2: Source project’s scoping scenarios contain source batch default scoping scenario; however, source project’s templates are different from source batch default scoping scenario templates. This template comparison will be done on a Cost Type basis.
Transfer Process & Result: Project specific templates and scoping data of the source project will be copied and carried over to the new project under the batch scoping scenario in the target cycle/scenario (that is, the source batch scoping scenario setup will also be copied to the target cycle/scenario, but its configured template won’t apply to the said project specific template and scoping data).
Scenario 3: Source project’s scoping scenarios contain source batch default scoping scenario and its configured scoping templates are the same templates as source batch scoping scenario, i.e. the UTD system templates.
Scenario 3-A: Source batch default scoping scenario exists in the target cycle/scenario, that is, source batch default scoping scenario has already been transferred to the target cycle/scenario, or it shares the same name with the target batch default scoping scenario; and the configured templates of the source and target batch default scoping scenarios are the same.
Transfer Process & Result: Source batch default scoping scenario will not be transferred again, and the corresponding scoping data of the source project will be carried over to the target cycle/scenario based on the target batch default scoping scenario setup.
Scenario 3-B: Source batch default scoping scenario exists in the target cycle/scenario, that is, the source batch default scoping scenario has already been transferred to the target cycle/scenario, or it shares the same name with the target batch default scoping scenario; however, the configured templates of the source and target batch default scoping scenarios are different.
Transfer Process & Result: Project transfer will fail, and an alert message shall be prompted.
Scenario 3-C: Source batch default scoping scenario does not exist in the target cycle/scenario by repeated transfers or sharing the same scoping scenario name.
Transfer Process & Result: Source batch default scoping scenario, templates, and scoping data of the source project will be copied and carried over to the target cycle/scenario; source batch default scoping scenario will be copied as a new batch default scoping scenario and apply to all the projects in the target cycle/scenario.
Scenario 3-D: Source batch default scoping scenario does not exist in the target cycle/scenario by repeated transfers or sharing the same scoping scenario name; however, there’s a project scoping scenario in the target cycle/scenario which happens to have the same scoping scenario name as the source batch scoping scenario..
Transfer Process & Result: Source batch default scoping scenario shall be carried over as described in Scenario 3-C. The existing project scoping scenario in the target cycle/scenario shall be updated as the copied batch default scoping scenario; however, its own configured templates shall be kept intact under that batch scoping scenario.
The transferred batch scoping scenario and its template configuration are unmodifiable and undeletable in the target cycle/scenario. The Current setting of the source batch default scoping scenario shall not be copied to the target. If you need to transfer source batch default scoping scenarios to the target, it is recommended to modify the system generated batch default scoping scenario in the target to the same as the source current batch default scoping scenario before project transfer.
View Project Reports and Adjust Project Cost Estimate
Select a project on the current page by checking its check box, select all projects on the current page by checking the check box in the column header, or select all found projects by checking the check box Select all found records. After you have selected the project(s), you can perform one of the following operations:
❖Select a report in the Report dropdown list and click the Go button. The system will display the specific report for the selected project(s) in a new window.
❖Click the Adjust Project Cost Estimate button and the system will go to the Project Estimate Adjustment page.
Calculate Project Distance and View Map
To calculate the distance among projects, select one or more projects by checking the checkbox beside the Project ID of each project, enter a distance number in the Projects with Distance to Each Other Shorter than field at the bottom of the Browse Planning Projects or Browse Implementation Projects page, and click the Calculate button. The system will then go to the Calculate Result page.
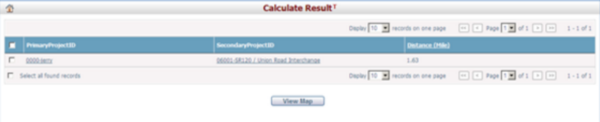
To view projects on GIS map, select or more projects by checking the checkbox beside the Project ID of each project, and then click the View Map button.