Navigate Here: Projects > Browse Projects; select a project > Implementation tab > Schedules tab, click Edit icon ![]() at the end of the row
at the end of the row
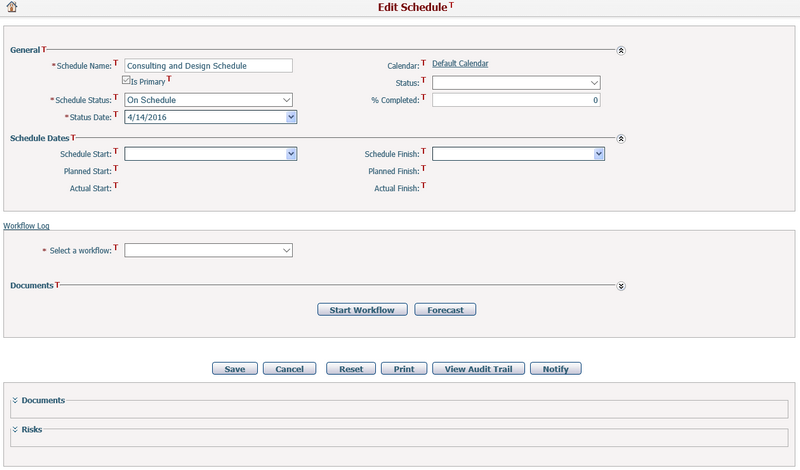
You can edit the general information of a schedule on Edit Schedule page.
To edit the general information of a schedule, modify any of the following fields:
The required fields are noted with an asterisk (*).
Schedule Name*: The name of the schedule.
Calendar: The current schedule's calendar. It will apply to all tasks under this schedule. By default, it will be the system's base calendar and read-only. (Note: You can change this schedule calendar in Gantt Chart view only mode.)
Is Primary: If this option is checked, it means that the schedule is the primary schedule for this project.
Status: The status of the schedule. There are five statuses: Approved, Closed, Draft, Rejected, Under Review.
Schedule Status*: The schedule progress status. There are four statuses: Behind Schedule, Completed, On Hold, and On Schedule. By default, On Schedule is selected.
% Completed: The implementation progress of the project. Percentage can be selected from 1% to 100%.
Status Date*: The date when the schedule status is tracked.
Note: The Schedule Status, % Completed and Status Date will be updated if the Status Date is earlier than the Status Date of a new Project Status which is creating for the same project and schedule.
Schedule Start & Finish: The planned start and finish date of the schedule.
Planned Start & Finish: The earliest start date and the latest finish dates computed from all tasks of the schedule. They are read-only fields.
Actual Start: The earliest actual start date computed from all tasks of the schedule. It is a read-only field.
Actual Finish: The latest actual finish date computed from all tasks of the schedule only when all tasks in the schedule have been completed. It is a read-only field.
Once you've finished editing, click the Save button to save the schedule general information.
Click the Cancel button to go to the Schedules tab under Project Management page without saving the new schedule.
If the current schedule is not a primary schedule, you can click the Delete button to delete it with all of its tasks and baselines.
Click the Reset button to clear the latest changes.
You can print information of this schedule through pre-defined document template by clicking the Print button. The system will then open the Generate Dynamic Document page.
You can view the change history of this schedule by clicking the View Audit Trail button. The system will then open the Browse Audit Trail Details page in a new window.
Click the Notify button to send notification to relevant persons about the schedule. The system will then go to the Send Notification page.
If the schedule related workflow is activated, you can click the Start Workflow button to initiate the workflow or Forecast button to see the workflow activities’ detail.